

How to Use Crimp Beads, Tubes & Covers
How to Use Crimp Beads, Tubes & Covers
It is important to know how this work, as they are essential for attaching clasps to the ends go beading wire (7-Strand, 19-Strand or 49-Strand). If you are using crimp beads or tubes to position beads along beading wire or crimpable chain, experiment with which shape and size to use: they will become part of the design as they will be visible. Crimp beads flatten into little rectangular shapes, whereas tubes flatten into squares.
View our selection of Crimp Beads, Tubes & Covers.
Attaching a jump ring or clasp to beading wire
Crimps are available as round beads or tubes. It doesn't matter which style you use when using a crimp cover, as the cover will hide the bead or tube. You just need to make sure that the inner diameter of the crimp bead or tube is large enough for the beading wire to pass through twice, and that the crimp cover is large enough to cover the bead or tube. To attach a clasp instead of a jump ring, follow the method shown, but instead of sliding on a jump ring in the first step, slide a clasp onto the beading wire.
Step 1:
Take a length of beading wire, thread on a crimp bead or tube and position it roughly 2-inch from one end. We used a crimp tube for the photographs. Thread on a jump ring, then pass the short end of the beading wire back through the crimp tube, trapping the jump ring in the resulting loop.
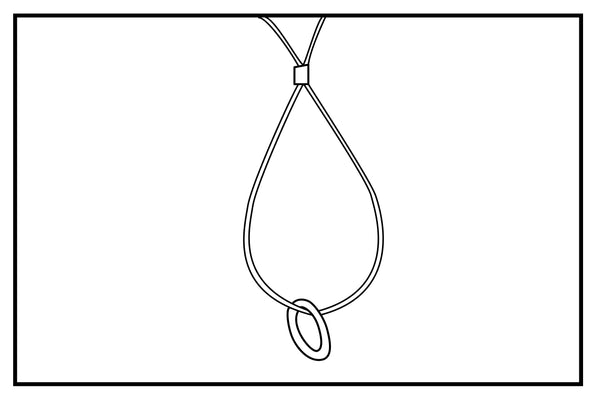
Step 2:
Slide the crimp tube up toward the jump ring so that the loop if fairly tight, but there is still enough space around the crimp tube to attach a crimp cover.

Step 3:
Make sure the wires inside the crimp tube are parallel and not crossing over. Use chain nose pliers to squeeze the crimp tube, flattening it. Work the tool backward and forward over the crimp tube, so that the beading wire is held securely in place.

Step 4:
Pull the shorter length of wire out to one side of the flattened crimp tube, and snip off the excess with nippers as close to the crimp tube as possible.

Step 5:
Choose a crimp cover large enough to fit over your crimp tube. Grip the crimp cover with chain nose pliers with the opening facing outward, and position it so that the crimp tube is sitting inside. Gently squeeze the crimp cover closed over the crimp tube; you will find that the crimp cover closes almost completely, but not quite.

Step 6:
Move your chain nose pliers so that the jaws are at the top and bottom of the crimp cover and give it a couple more gentle squeezes; you should find that this helps the edges of the crimp cover to meet. Use the pliers to give the crimp cover little squeezes here and there where needed to mould the cover around the crimp tube.

TIP:
The most important thing to watch out for when attaching a crimp cover is that the beading wire does not get caught in between the edges of the crimp cover, as this could cause the wire to break. The wires need to sit neatly back within the crimp cover.
Happy Beading, and don't forget to check out our other Jewellery Tutorials and Free Jewellery Making Videos.